How To Easily Weed A Garden
The Secret of Easy Weeding
Stale Seed Bed Method for the Garden
Author: Greg Baka
This old-time farming method of weed control can work wonders in today's home garden. And no additional equipment or chemicals are required!
False Seed Bed Method: the Basics
To use this method, you first prepare your seedbed a few weeks BEFORE you intend to plant your garden. Then you grow, and kill, a few "crops" of baby weeds prior to planting your garden seeds.

The magic of this method is that it reduces or eliminates the weed seeds that are likely to sprout during your gardening season. All soil has a "bank" (a buried supply) of weed seeds. They can lie dormant in the soil for months or even years. Fortunately, most will only germinate and grow when they are located in the top couple inches of soil.
The False Seed Bed Method takes advantage of these facts by purposely helping the weeds near the surface to germinate, grow just a little, and then be killed. All while the space is bare and easy to manage. Afterwards, you plant your crops and enjoy not having to fight a relentless army of weeds.
How to use the False or Stale Seed Bed Method
This method originated in the days before herbicides, when clever weeding was crucial to a farm's success. Although this article focuses on garden-scale use, we occasionally note options for those with a tractor.
First Step: Prepare the garden as one big seed bed
Task 1
Start by cutting down all large weeds and crop residue, then moving them to your compost pile. If you don't have tall weeds or crop residue, you can also just mow the whole garden with your blades set low. For those with a tractor, a brush-hog or flail mower works well.
Task 2
Cultivate or till the soil - but just deep enough to kill the current living plants. The shallower you disturb the soil, the less weed seeds will rise towards the surface. Shoot for a maximum of 6 inches, though 4 or even 2 inches is better.
In small gardens, this task can be done with a spade, a grub hoe, or with a wheel cultivator. In large gardens a rototiller can be used, but remember to limit the depth. Those with a tractor can use a disc or a 3-point rotary tiller.
Task 3
Add amendments, fertilizer, or compost if desired. Work them into the soil with a lighter and more shallow repeat of Task 2.
If you decide to add more later, during the growing season, remember to just barely scratch them into the surface. Do not chop them in deep because that encourages any deep weed seeds to sprout.
Task 4
Crumble and smooth the seed bed. In the garden, this is normally done with rakes. A heavy garden rake or a stone rake will work well for breaking up clods and moving soil to low spots. Then a more flexible lawn rake will finish the smoothing and collect any remaining bits of plant residue. In farm fields, this step is done with first a spring-tooth or spike-tooth harrow or drag (the names vary regionally), followed by a cultipacker.
Second Step: Water, and wait for the weeds to appear
Task 5
Water your garden just like you would right after you plant garden seeds. Keep it moist, but not soggy. If you are having a wet Spring, you can skip this step.
Task 6
Keep the soil warm so the weed seeds germinate quickly. Preventing shading of the soil is one of the reasons we moved the old plant residue to the compost pile.
If the weather is cold, gardeners can spread clear plastic sheeting to warm the soil by turning the garden beds into solar collectors. Use boards, stones, or bricks along the edges to hold the sheets in place. If the soil dries out, roll back the plastic sheet just long enough to water.
Third Step: Kill the young weeds, over and over again
Task 7
You will do this for the first time about 14 days after preparing the seed bed.
Afterwards, you will do it whenever a new batch of weeds is large enough.
Let's stop using the Task list format to allow detailed explanations about the weed killing process.
WHEN to Weed the Stale Seed Bed
Now you need to know when weeds are easy to kill.
The most effective time to weed is when the first leaves appear.
A seed is a biological energy storage device, sort of like a battery. That energy is used to launch the portions of the plant that collect nutrients and energy. First the roots head down for moisture, and then the stalk heads upward for sunlight energy.
The seedling plant has depleted all the energy stored in the seed right about the same time that the first leaves appear. If anything happens to the young plant at this time; if the leaves are removed or damaged, if the stem is cut, or if it is uprooted or buried - there will not be enough energy left in the seed for the plant to recover, and it will die.
HOW to Weed the Stale Seed Bed
How you weed will depend on the size of your garden, and the tools you have.
The most important thing is to keep it shallow. Zero or one inch deep is best, two inches is the maximum.

Using a garden hoe:
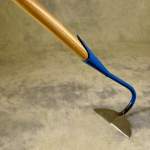
Select a hoe that slides, scrapes, and slices across the surface of the soil. Do NOT use one that chops or hacks into the soil. The various types of hoes that scrape and slice are categorized as either light draw hoes, reciprocating hoes (or oscillating, stirrup, or hula hoes), or flat hoes (or push, dutch, or scuffle hoes). All of these types can be seen in this article.

Using a cultivator:
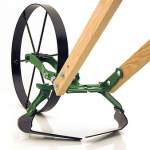
These are machines with blades that scrape the soil surface. In the garden, it is a manual pushed machine called a wheel cultivator or a wheel hoe that is outfitted with an attachment called Sweeps or Weeding Blades. On a farm, they use a wide cultivator implement hooked to the tractor.

Using a flame weeder:
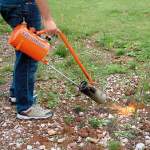
Another option for areas with consistently wet Spring weather is to use a propane Flame Weeder which kills the weed seedlings by intense heat, but does not disturb the soil at all. They can even be used on soggy soil. There are small hand-held versions for home gardens, and wheeled versions that can be pushed through big commercial gardens. For farm fields, there are wide trailer type flame weeders pulled with a tractor or truck.
Summary: Why the false seed bed method works
This weeding method works because it cooperates with nature, rather than fighting it. It is indeed best to manage your garden so that you only have to deal with small weeds. This method was known to farmers for many years, but rarely used by gardeners. Now that gardeners are kicking the herbicide habit it is time for this weed secret to be shared.
Remember where seeds usually sprout...
- 0" to 1" deep:
- Seeds in the top inch of soil are most able to germinate and will do so very rapidly.
- 1" to 2" deep:
- Seeds at this depth can germinate, but are slower to sprout and reach the surface.
- 2" to 4" deep:
- Seeds here are mostly dormant. Only a few species will germinate at this depth.
- 4" and deeper:
- All the seeds are dormant. Only bulbs and tubers will sprout and grow at this depth.
Remember that the process takes some time...
It is important to realize that the 14 days shown between preparing your soil and planting your garden is a minimum . Use those first nice weeks of Spring to prepare your soil and do the shallow weeding every 14 days or so until the time is right for planting. Another option is to prepare your soil in the Fall after harvest and then keep doing the shallow weeding every 14 days until the weather turns cold. Start the weeding again in early Spring.
Do not be the unprepared one-weekend gardener who tills their soil and plants their crops all in the same weekend. A little planning and preparation is required for this method to work.
Once you begin using the Stale Seed Bed technique, you will forever hesitate to deeply till or dig your soil to avoid bringing buried weed seeds up to the surface.
See more of our gardening articles:
- Sweet Corn Growing Guide
- How To Aerate Garden Soil
- Garden Weeds - The Good, the Bad, and the Ugly
- Garden Seeder Buying Guide
How To Easily Weed A Garden
Source: https://www.easydigging.com/gardening/articles-g/easy-weeding.html
Posted by: ballauneance.blogspot.com

0 Response to "How To Easily Weed A Garden"
Post a Comment